Sing To Me Sweetly Cinnamon Baked Apples

PREP TIME: 10 MINUTES:    BAKING TIME: 30 MINUTES    SERVES: 4

This healthy and quick take on baked apples is so reminiscent of the days I spent with my Granny who loved to bake with fruit.  I made these with the exotic flavours of cinnamon, Medjool dates for extra natural sweetness and the caramel essence of pecans, to create a dairy, gluten and refined sugar free dessert that keeps the guilt at bay. Really it is such a healthy sweet indulgence – who dares resist!

NUTRITIONAL BITES

Apples contain powerful antioxidants that prevent oxidation of cell membrane fats. When it comes to our cardiovascular system, this is especially important, because fat oxidation in the membrane of our cells that line our blood vessels is a primary risk factor for clogging of the arteries and other cardiovascular issues. 

Ingredients

4 apples (firmer varieties are best - I used Cortland)
½ cup of pecans, finely chopped
Rind of one small lemon
2 teaspoons lemon juice
2 teaspoons coconut sugar
2 teaspoons coconut oil, unmelted
1 teaspoon of cinnamon
2 Medjool date, diced into small ‘pea-sized’ pieces
1 tablespoon of raisins

 Let’s Bake!

  1. Heat the oven to 325F.

  2. De-core each apple leaving a generous hole for the filling.

  3. Mix all the other ingredients together in a small bowl to make the apple filling, making sure the coconut oil is broken down well.

  4. Using a small spoon and clean fingers, stuff the filling into each apple hole compacting it down to get as much inside as possible.

  5. Place the apples on parchment paper and slid into the pre-heated oven for 30 minutes.

  6. Take the tray out of the oven and pop the apples on a serving plate, spooning any sweet apple juice that remains on the parchment paper over each apple.

I like to add a dollop of my sweet cashew cream to top it all off. So yummy and guilt-free! 


Anti-Aging Bone Broth

PREP TIME: 15 MINUTES     COOK TIME: 24 HOURS  MAKES 2+ LITRES OF BROTH

NUTRITIONAL BITES

As the current media darling of youthful skin and weight loss, you may have already heard of the proclaimed benefits of bone broth. 

According to Dr Kerryann Petrucci, New York Times best-selling author of 'The Bone Broth Diet', "When you eat bone broth, you’re really eating cooked collagen. This is a powerful way to restore collagen in your skin and make those wrinkles disappear. Sure, you could find a lot of products with "collagen" on the label, but dietary collagen is more potent — it mainlines collagen to your cells. Additionally, the gelatin derived from the collagen you get in bone broth heals your digestive tract which is a surefire way to prevent inflammation and aging skin."  

I always like to use a crock pot to make my broth as I can leave it to cook safely for the maximum amount of time, with no worries. 

INGREDIENTS

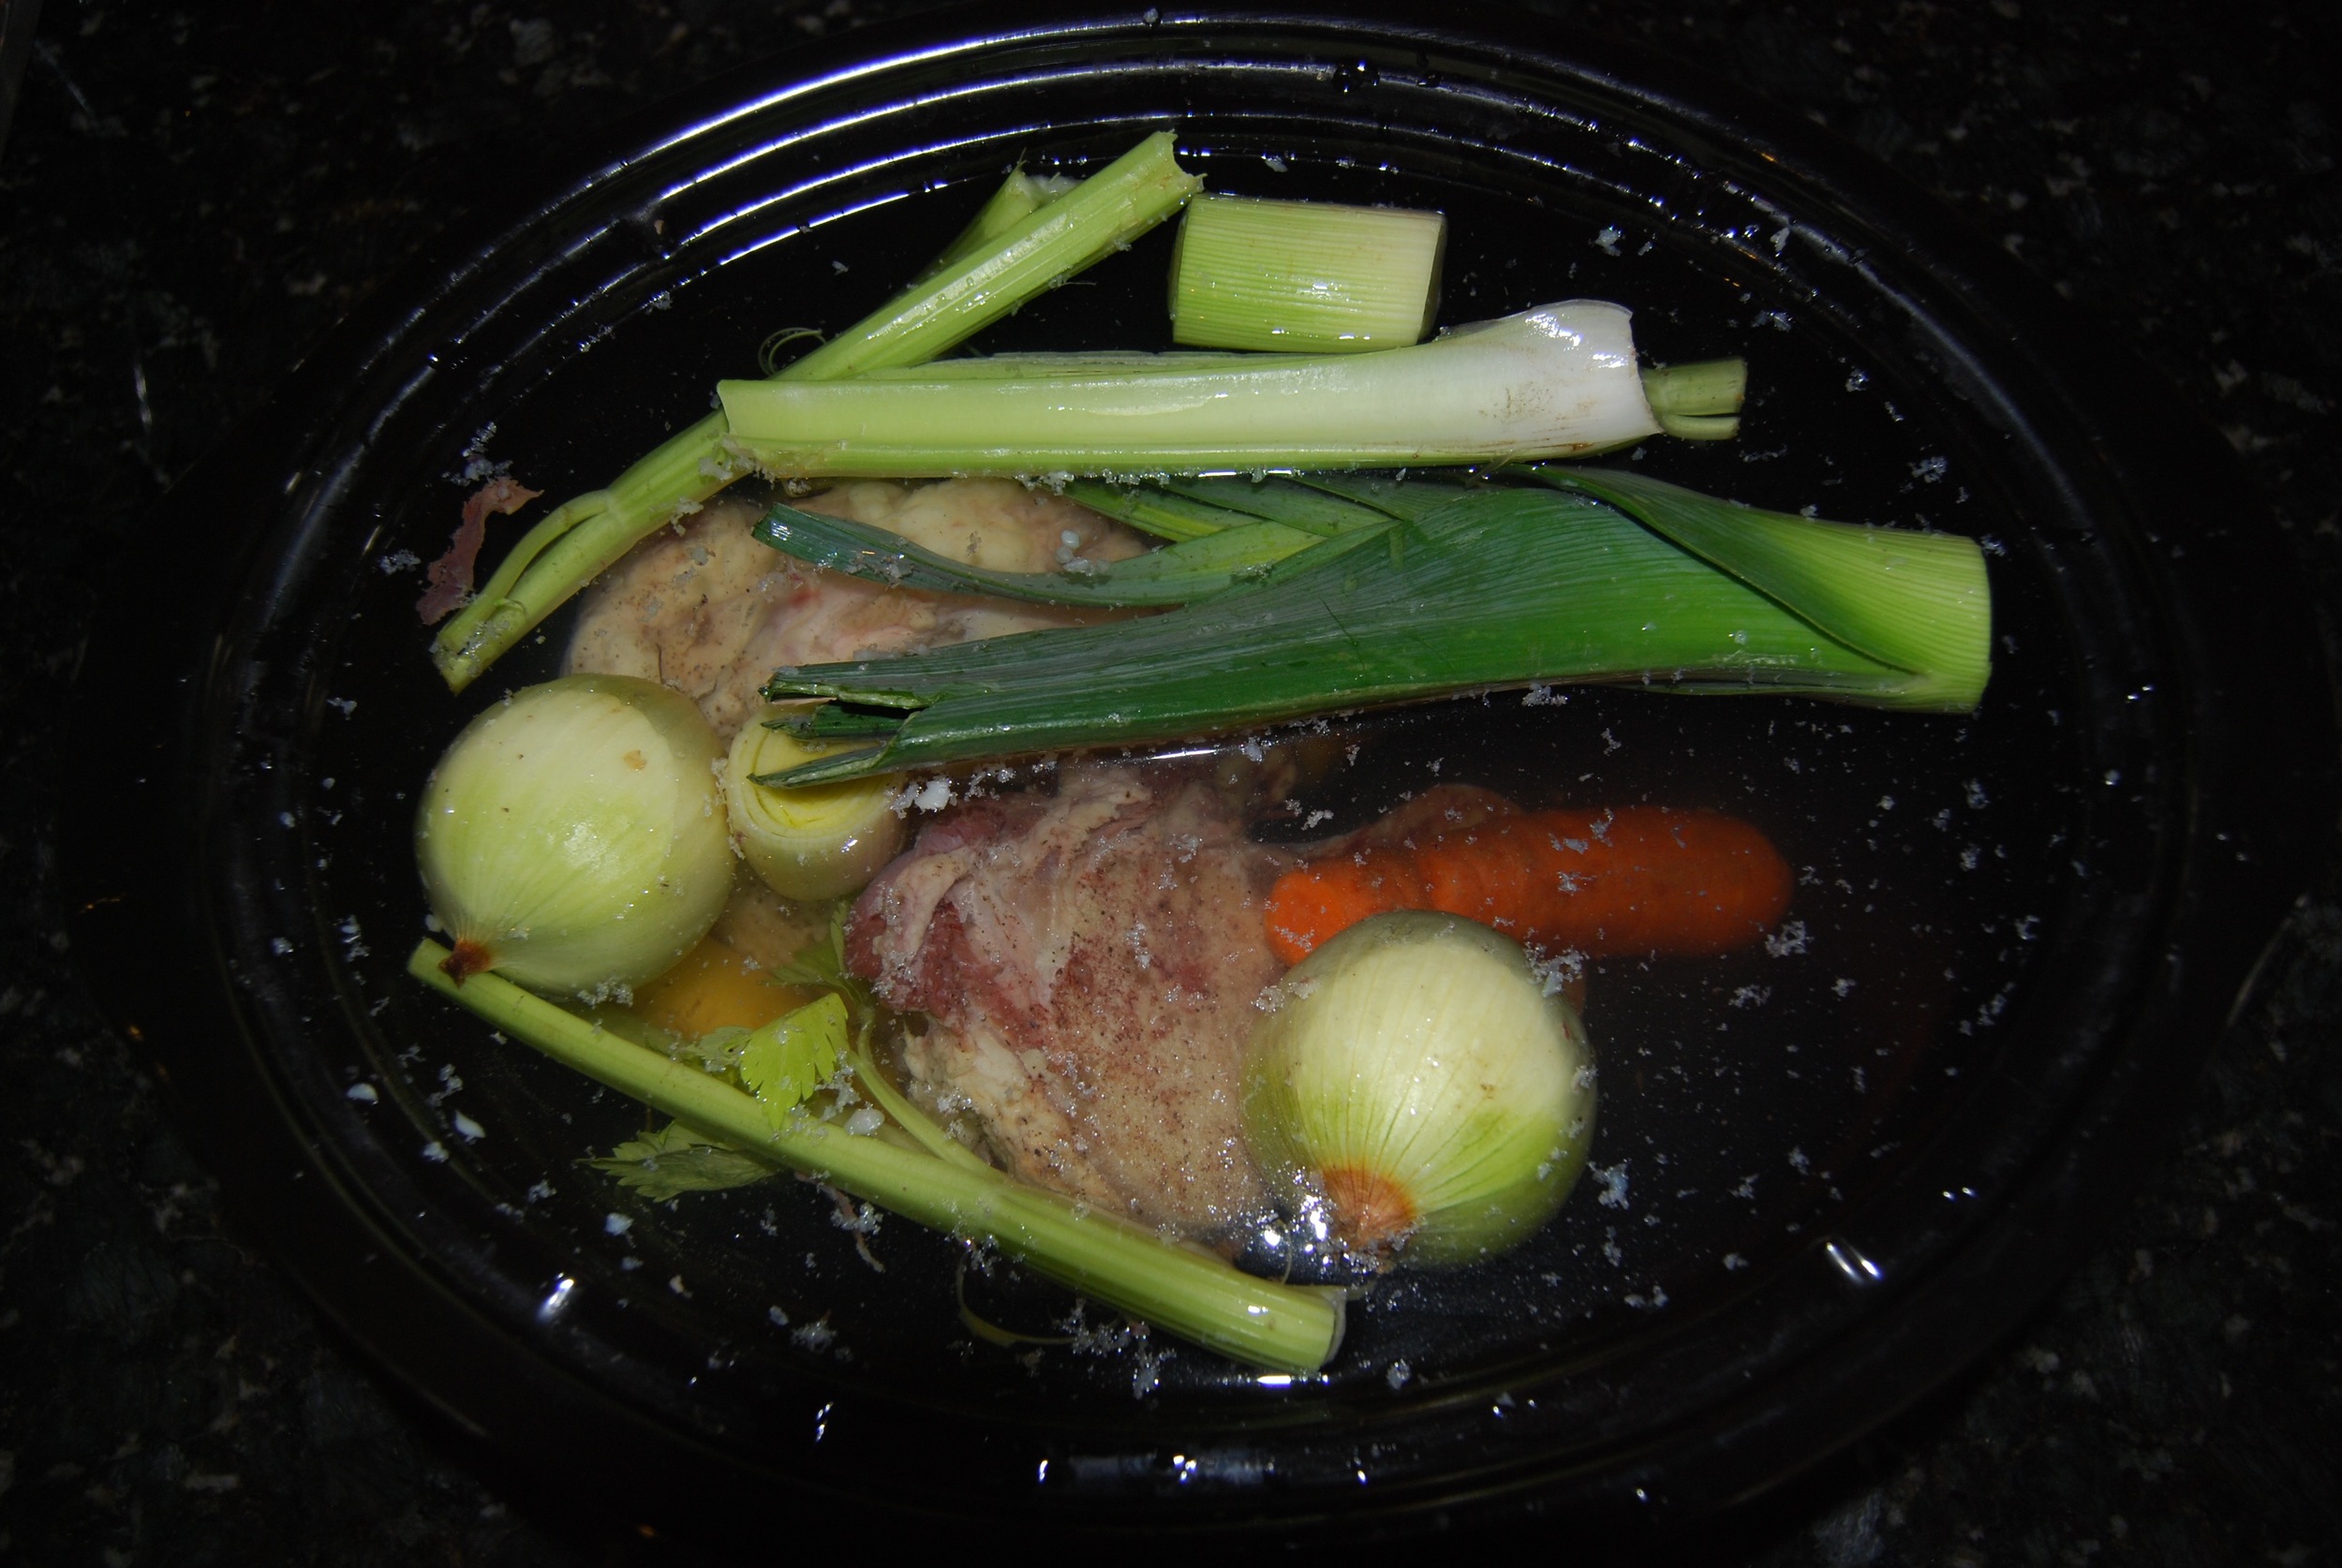
3 pounds of chicken (pasture-raised or organic) wing tips, neck and backbone (get the butcher to bundle it up for you)
2 tablespoons of apple cider vinegar
2 large onions, peeled, ends cut off and cut in half
3 large carrots, peeled and cut in half
4 sticks of celery, cut to fit the pot
1 leek, rough top leaves removed and cut into quarters
4 bay leaves
6 black, white or green peppercorns
2 inches of ginger, whole
1 teaspoon of Celtic sea salt
Cold water to cover chicken (preferably filtered)

*Many recipes call for chicken feet to provide extra gelatin. Let me assure you, they are extremely hard to find and with the chicken parts I'm using in this recipe, you will have plenty of gelatin, so I don't want you to stress. :) 

LET'S COOK!

  1. Pop the chicken pieces into your slow cooker (or a large stock pot) with just enough cold water to cover it (approximately 12 cups). Add in the apple cider vinegar and let this stand for 45 minutes. This is a crucial step as the vinegar helps extract the valuable minerals from the bones and makes them available for you!

  2. Add in all the remaining ingredients and set the crock pot on high heat for 2 hours then change to low heat (lid on) for 22 hours. If you don't own a crock pot, just use a large stock pot with a tight fitting lid, bring to the boil and turn down to simmer for 24 hours (lid on).

  3. Occasionally check the broth and if you see any scum floating on the surface, simply remove it with a ladle. Remember to put the lid back on!

  4. After 24 hours, you are ready to sieve your broth, removing the veggies, so place a large fine-meshed sieve over a suitably sized heat-proof bowl (I like to use a large pyrex measuring jug) and place it in the bottom of the sink; this way you don't have to worry about spills. Have 3 x 1 liter size mason jars standing by the sink, ready to pour the strained broth into.

  5. Carefully (it's still hot) carry your stock pot or crock pot over to the side of the sink and pour the stock into the sieve until you have sieved all the broth. You may have to stop half-way through to pour the already-strained broth into a mason jar.

  6. Cool the broth to room temperature then pop into your fridge leaving the lids off the mason jars, allowing the broth to cool down. After several hours, the chicken fat will rise to the top of the mason jars - go ahead and discard it (otherwise the broth will be very greasy).

  7. You can keep the broth in the fridge for up to 3/4 days OR you can transfer it into several glass pyrex dishes and place in your freezer where it will keep for several months.

Note: When you pull the chicken broth from the fridge it should have the consistency of jello (which is the gelatin) which is exactly what you are looking for. However, once you heat it, it will return to a liquid state. I like to drink this broth every day, either just as it is or sometimes I add greens, like kale or bok choy, right at the end of heating it up (so as not to destroy the nutrients) as these fresh veggies boost the flavor and nutritional value.

Mediterranean Olive Dip

PREP TIME: 10 minutes.  BLEND TIME: 5 minutes

I created this dip for one of my ‘nukery’ (nutrition+cooking) classes to pair with my Herby Almond crackers. It’s a delicious, savoury creamy dip that has an intense flavour, making it nearly impossible to resist! I love it as a perfect last minute throw-together when friends drop over unexpectedly OR for a stress-free dinner party appetiser; I made a double batch for a recent dinner party and before my girlfriends and I could get to it, the men had polished it off! 

NUTRITIONAL BITES

Olives are rich in phytonutrients that provide antioxidant and anti-inflamatory nutrients which help protect our bodies.

Olives are also a good source of phytoestrogens which play a part in balancing our hormonal system, helping with menopausal symptoms. 

Ingredients

1 cup black olives, pitted
1 garlic clove
1 tablespoon tahini paste
1 tablespoon olive oil
2 teaspoon dulse flakes
1 teaspoon chia seeds (ground or whole)
1 teaspoon lemon juice
½ teaspoon Celtic sea salt

Let’s Blend!

  1. Place all the ingredients into a high speed blender and blend for a minute or two until the dip is smooth and creamy. And that’s it!

Flapjack Crackerjack (aka Old Fashioned Oat Bars)

PREP TIME:  20 minutes     COOK TIME: 25 minutes 

Nutritional Bites

These flapjacks are so versatile - they are a wonderful carbohydrate/protein food after a workout or sports event to replenish glycogen levels in the body.
The dried fruit is not only a tasty addition but the fibre in the fruit help support out natural elimination rhythms

When I lived in London, I loved eating at this popular health food restaurant in Covent Garden, called 'Food For Thought' where they sold the most delicious and addictive flapjacks. I recently went back to my old haunt and found it had shut up shop - no more flapjacks to be had!  So I’ve done my best to recreate them and I think I’ve come pretty close on the taste. Most importantly, I’m delighted to say that my flapjacks are also dairy free, gluten free, refined sugar free and nut free. Perfect for packing into lunch boxes, for school sporting events, camps and post workouts, or any time you need a delicious protein, fibre and carb refueling snack. Make a double batch because they also freeze really well – you just need to wrap them tightly in parchment paper (preferably unbleached/chlorine free) and slid into a zip-lock bag. 

Ingredients

¾ cup brown rice syrup
¼ cup maple syrup (or honey)
¼ cup coconut oil
½ teaspoon Celtic sea salt
3 ½ cups rolled oats
½ cup sultanas or raisins (roughly chopped) or currants
¼ cup sesame seeds (unhulled – brown, preferably)
1 teaspoon of vanilla extract

Let’s Bake

  1. Heat oven to 350F (325F convection) then line a square pan (9x9”) with parchment paper (I find this makes it easier to lift the flapjacks out) or oil liberally with coconut oil

  2. Melt the coconut oil, brown rice syrup, maple syrup (or honey) and salt gently in a medium sized pan (not a small pan as there will be room for all those other ingredients) for a few minutes

  3. Add the oats, sultanas/raisins/currants, the sesame seeds and vanilla extract mixing around with a wooden spoon until everything is well coated

  4. Spoon the flapjack mixture onto the parchment paper and press down hard to make an even layer, using the back of a clean wooden spoon or use your hands. Pressing down is really crucial to holding the flapjacks together, so put some muscle into it!

  5. Slip the pan into the oven and cook for 20-25 minutes, or until the top is golden brown

  6. Remove the pan and place it on a wire rack to cool for 15 minutes. Then if you have been able to hold yourself back until this point, cut the flapjack into your desired lengths. I hope you doubled up the recipe…!

Roasted Red Pepper and Butternut Squash Soup

PREP TIME: 40 minutes     COOK TIME: 30 minutes     SERVES: 4-6

My sister Olivia served me this delicious soup whilst I was up visiting her in Scotland many years ago and I loved it! (Thanks Olivia!) 

I've since made a few BRIT BEET tweaks and recently served it at a special family dinner; it got rave reviews. I love it's unique flavour twist thanks to the roasted red peppers, plus the colour is really inviting. It's a really a beautiful Fall soup. 

Nutritional Bites

  • Butternut squash has a hefty amount of fiber helping to keep our waists trim and skin glowing.

  • It also has a high amount of vitamin C that helps boost our immune systems; maybe that's why ingenious Mother Nature makes it available come Fall, when the colds and flus hit.

Ingredients

3 red peppers
1 large butternut squash
2 large carrots, roughly chopped
1 large yellow onion
2 small cloves of garlic, minced
2 tablespoons of butter, coconut or olive oil
2-3 cups of vegetable or chicken stock, depending on how thick you like your soups

Let's Cook!

  1. Put the oven on at 400F. Cut the red peppers in halves and take out the little pips and any white pith (which is quite bitter). Place the peppers on a baking tray and bake for 20 minutes. Once cooked, pop them in a glass jar with a lid, to cool down. Remove charred skin and put aside.

  2. Whilst the peppers are doing their stuff in the oven, roughly dice up the onion, carrots and squash. With the squash being so tricky to handle, I find it easiest to cut the top and bottom off and then place it cut side down on my chopping board so that it does not roll around. Then I take a sharp knife and shave off the skin starting from the top and working down. Once the peel is off, I slice downwards into thick strips and then place these flat strips on the board and cut into smaller 1-2" pieces. You don’t have to be exact since you are going to puree the whole thing up anyway.

  3. Heat the oil in a large pan on the medium heat, then add the chopped onion and allow to cook for a few minutes.

  4. Next add the squash, carrots and garlic, cooking for a few more minutes, then pour in the stock.

  5. Bring to a gentle boil, before turning down to simmer for 10-15 minutes, just to soften the veggies. Lastly, add in the roasted red peppers.

  6. In a high-speed blend, puree up the soup till smooth and creamy. Season with salt and pepper.

  I usually serve the soup piping hot with a sprinkle of  chopped chives and a swirl or dab or my Sweet Maple Cashew Cream - simply delicious!